
FAQ > GL220
CONNECTING GL220 TO COMPUTER VIA USB
Step 1: Download and install both the USB driver and the APS software from our web site.
For GL220 Download Software >> Click Here
For GL820 Download Software >> Click Here
Step 2: Onced you have downloaded and installed both items, proceed to opening the GL220/820 APS software. You will get this screen onced open and next you will click on the connect button on the top right hand corner of the APS software (highlighted in red).

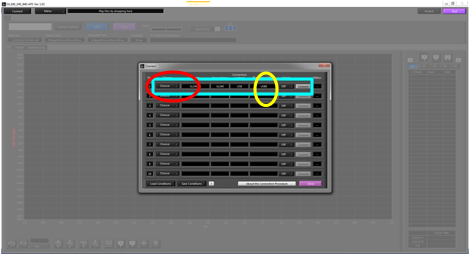
Step 3: You will now get a pop up window and will see many options. You will most likely be connecting up one GL on your computer and select connect on the top Column (highlighted in blue). Select which GL you are connecting to the computer using the drop down menu (highlighted in red). Next make sure the USB ID numbers matches on your GL and APS Software. You can check this on your GL by hitting the MENU button on the actual device and scroll through the menu to the I/F tab. Here you will see the USB settings and your USB ID. Double check the USB ID with what’s on your APS (highlighted in yellow). Now that everything correlates with one another, choose the connect button located to the right of your USB ID number which was highlighted in yellow and then click the close buttons for your setting to take place and load the GL to the computer.
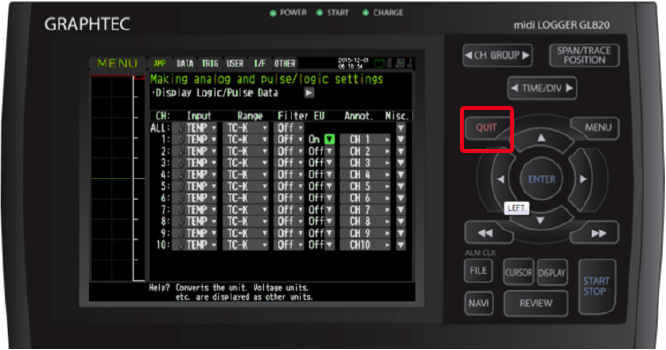
TURN ON PULSE / LOGIC
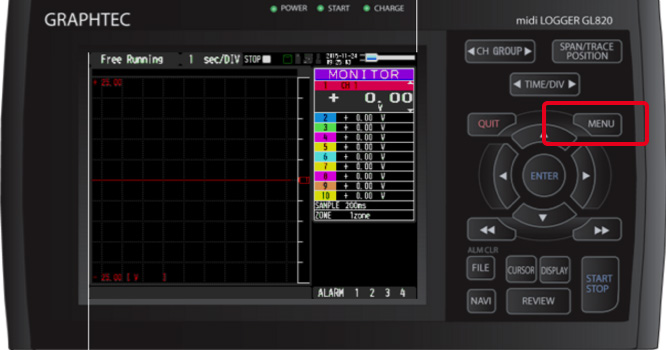
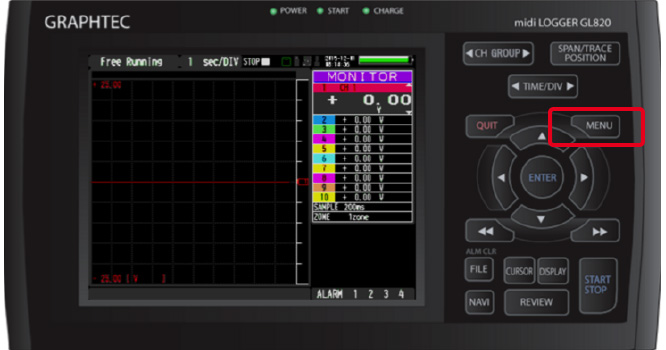
Step 1: From the main screen on your unit, hit the “MENU” button to proceed the menu screen.
Step 2: Once the “MENU” screen has come up, scroll down using the down arrow key.
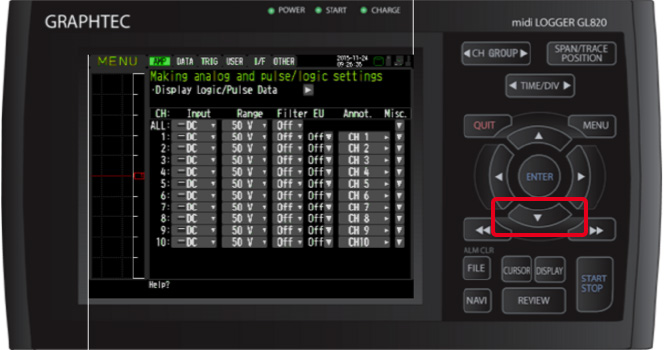
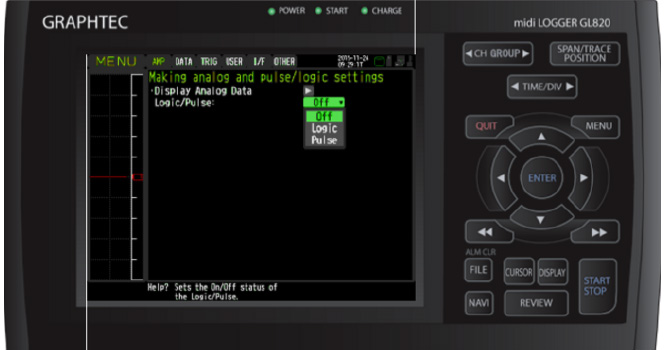
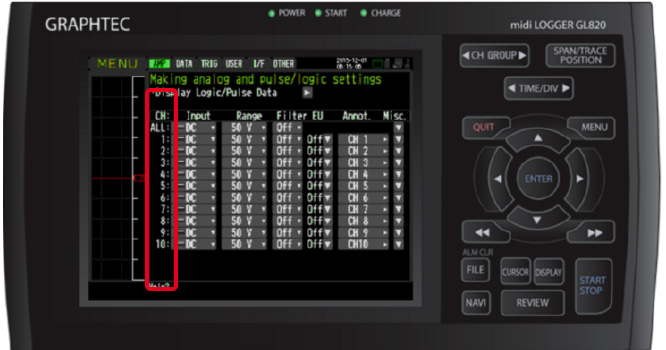
Step 3: Scroll down once until you reach the “Display Logic/Pulse Data” and hit the “ENTER” Button.
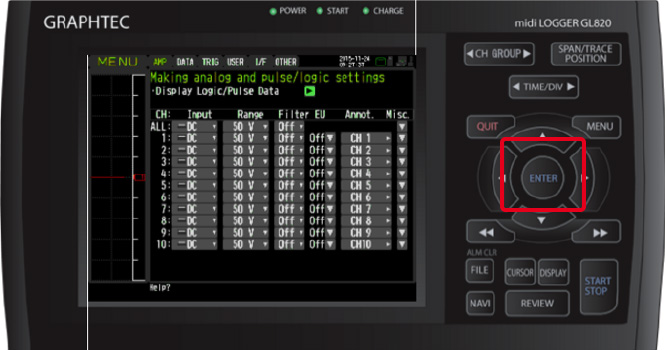
Step 4: Once at the “making analog and pulse/logic settings” Menu, on the Logic/Pulse option, choose which one you would like to use. Either Pulse or Logic.
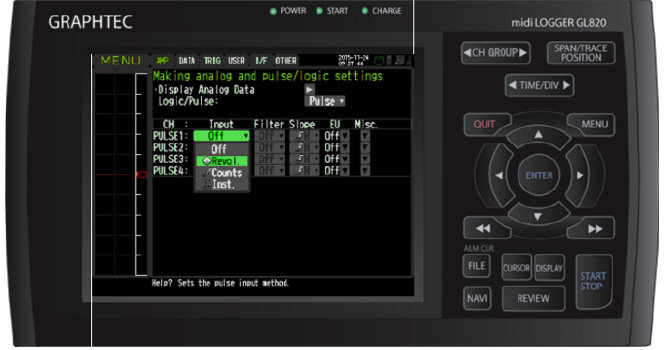
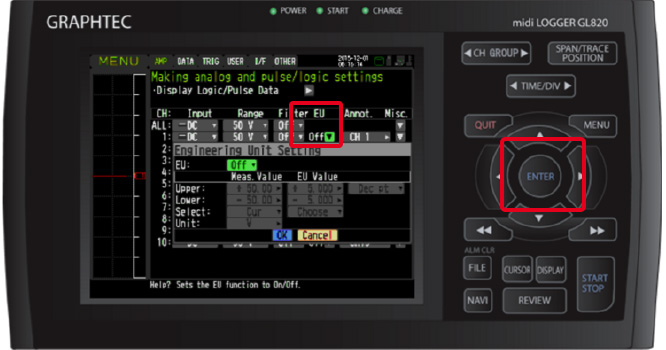
Step 5: Now choose which Input you would like to use, you have 3 different options to choose from.
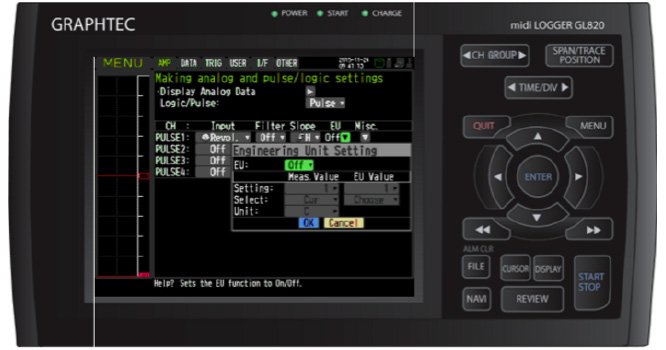
Step 6: You ca also use the Engineering scale to make sure the signal you have coming in is correct. When you are setting the high and lows for your pulse/ logic signal, the first column which says measured value will be your voltage range of the sensor that you are using. The second column, which is EU value will be the range at which your sensor can read (ex: 0 – 60 PSI).
Step 7: Once all of your values are set, you can hit QUIT on the GL to return to the main screen.
ADJUST TEMPERATURE TO ZERO
Step 1: From your GLXXX main screen hit the MENU button.
Step 2: When on the MENU screen, Scroll down to the channels you will be using to measure.
Step 3: Once you have picked which channel, scroll over to the right to the EU Column and click ENTER to bring the drop down MENU.
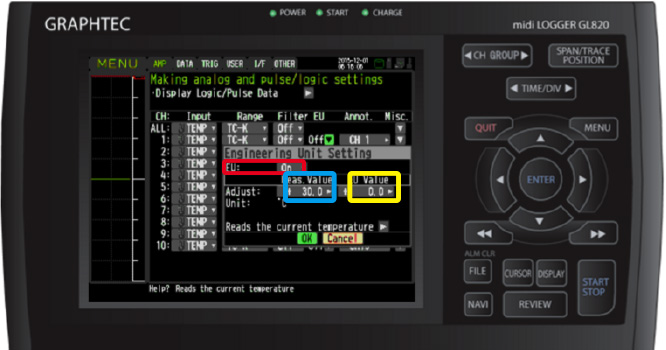
Step 4: Turn the EU Setting to on (highlighted in red). To set your adjustment you will use the adjust values. The Measured (highlighted in blue) will be what your Temperature is reading and your EU value (highlighted in yellow) will be what you want it adjusted to. SO if your temperature is off by 30 and you want to measure 0, then set the measured value to 30 and the EU value to 0. Once you values are set, click ok on the drop down menu to save settings.
Step 5: You can proceed with changing other channels to what you need or you can hit the QUIT button to exit back to the main screen.
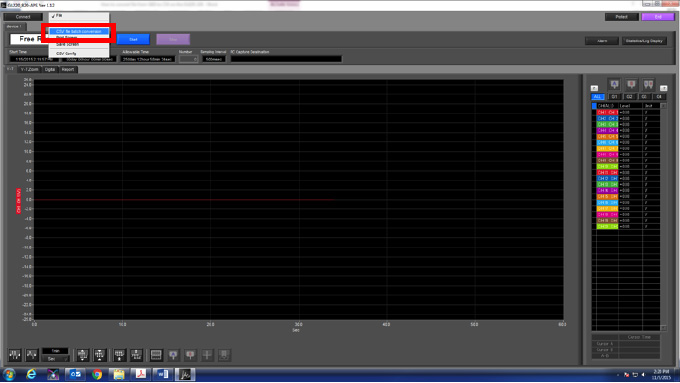
CONVERTING FILE GBD TO CSV ON GL220
Note: You can only convert from GBD to CSV, not the other way around. So it is best to save in GBD as you can convert to CSV at any time.
Step 1: Once you have opened the APS and connected the GL, you must press the File button located near the top left of the screen (highlighted in red).

Step 2: After clicking the file option, a drop down menu will appear and you choose the option GBD file batch conversion (highlighted in red).
Step 3: A new menu will pop up now that you selected the file option. From here press the add button (highlighted in red). This menu is a batch menu where your added files that you want to convert will show.
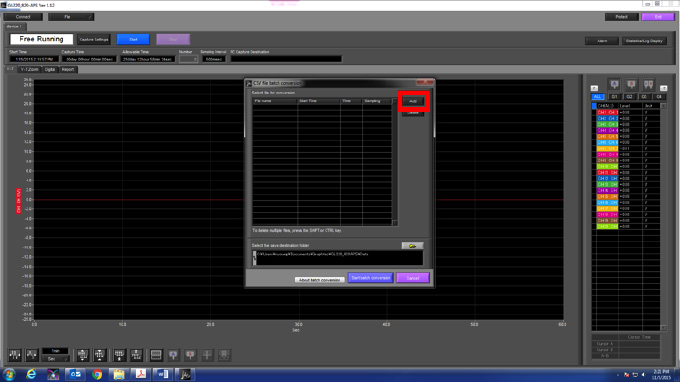
Step 4: When the new window pops up, you will have options on the left hand side on choosing where you are importing the file from (highlighted in green). Your files will appear on the right of where you select the file. Here is where you will see the files that are in the location you are choosing from, this is where you select the file you want (highlighted in red).

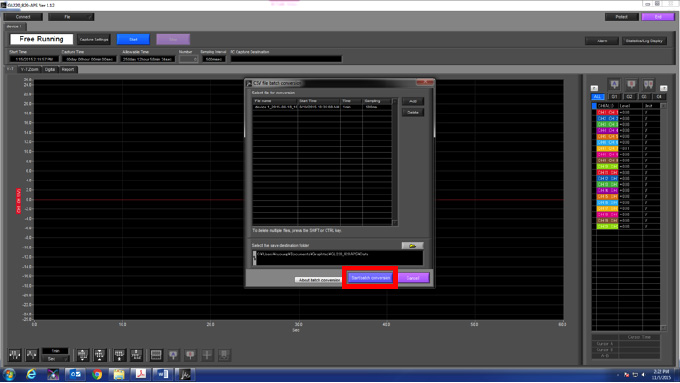
Step 5: After your file is selected, you will see what you chose pop up in the batch menu. From this point, you can either add more files to the batch or you can select start batch conversion (highlighted in red) which will convert the file you have selected
PRINT OR SAVE SCREEN DISPLAYS ON GL820 / GL220
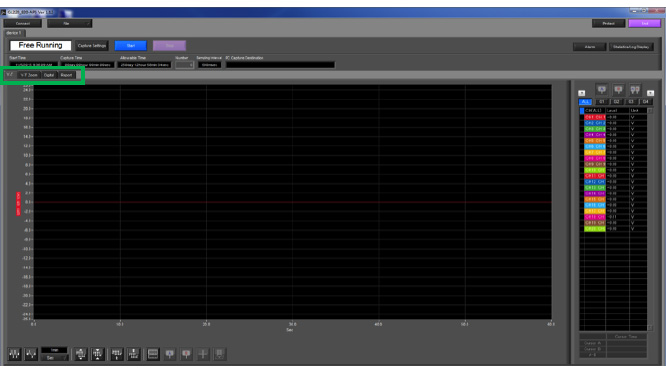
Step 1: After you open the software and connect your GL, you will be at a screen similar to this one. Here your graph will display the signal in the form of a wave or you can change the display to digital, or just have a report of your information (highlighted in green)
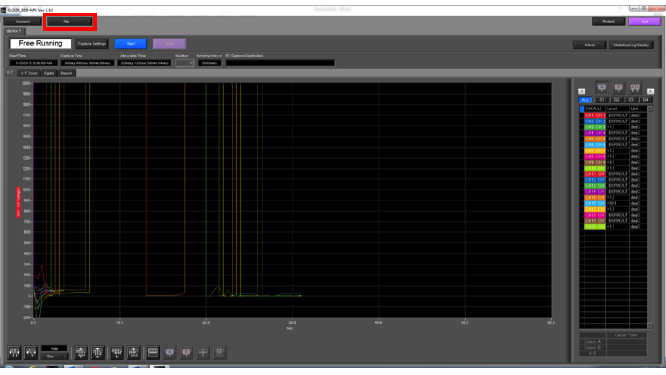
Step 2: To either print or save what you have on the screen (does not matter which screen you are in), you have to select the file option located near the top right hand side of the screen (highlighted in red).
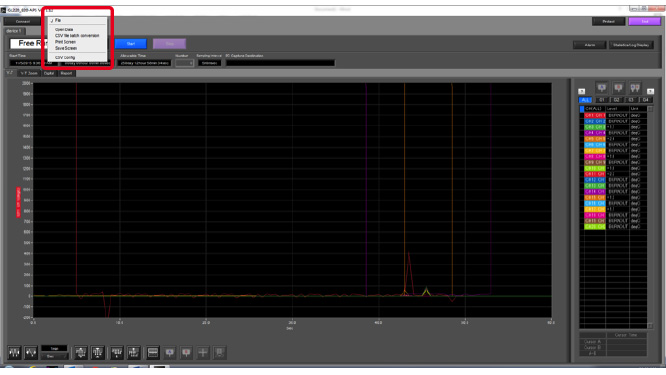
Step 3: Once you click the file, you will get a drop down menu and from here you can choose to either print the screen (send a screen shot to your printer) or you can save screen to internal or external memory.
INSTRUMENTS > FAQ > GL220